Farmers typically plough or till the soil before seeding, as this provides a means to get good seed to soil contact. It also makes it easy to bury the seed a little (generally larger seed = deeper depth), and softens the soil for initial root growth. It also messes up the soil structure by breaking up macro aggregates, destroys fungal hyphae that the plants have a symbiotic relationship with, and is generally equivalent to smashing up the homes of billions of tiny beneficial microbes and critters.
No till seeding isn’t new – it has been around for many decades, gradually increasing in prevalence. There are a number of different sorts; I’ve chosen the route of a double disc opener to minimise soil disturbance. Though it really should be called minimal till, not no till….
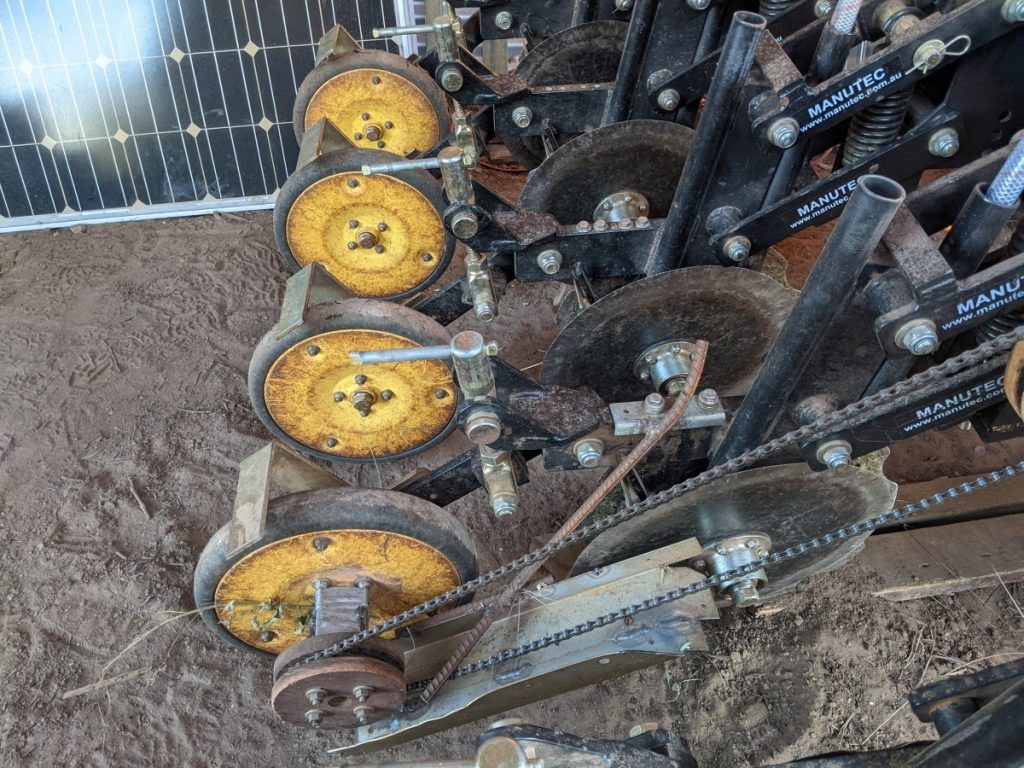
Commercial no till drills for a small farm like mine start at around $20k. Rather than do that, I’ve purchased one key part of the equipment, and built the rest around it myself. I purchased 5 double disc opener sets from Manutec, ex demo units, as the basis for my seed drill.
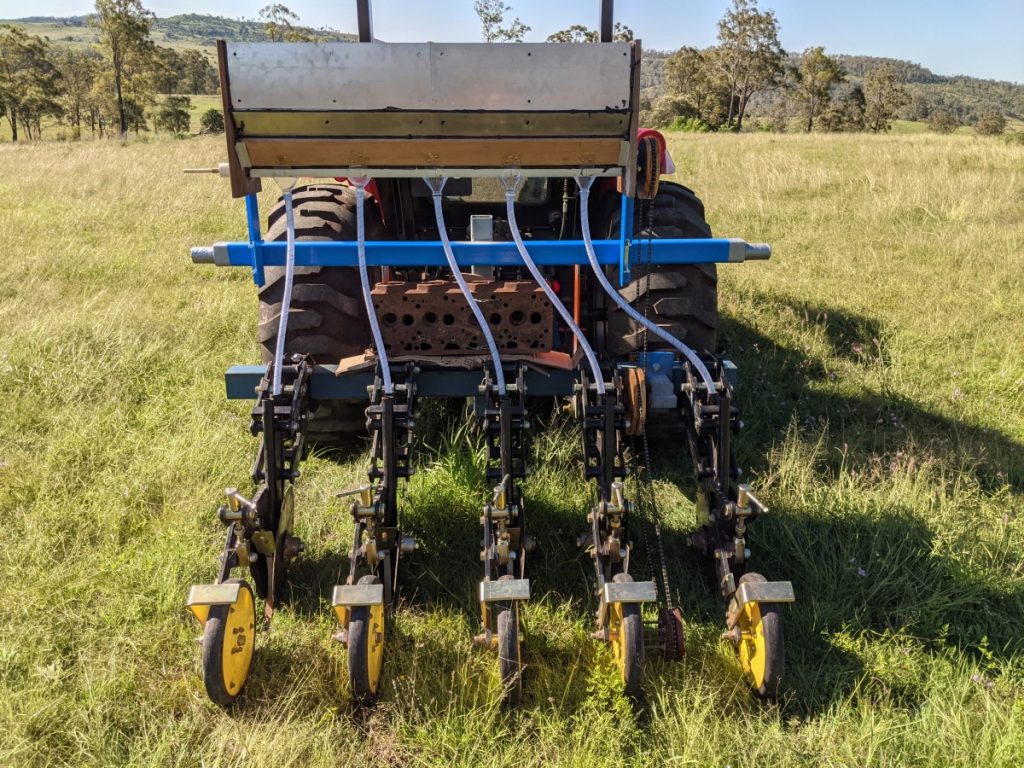
Here are some pics of the completed drill on its first run:


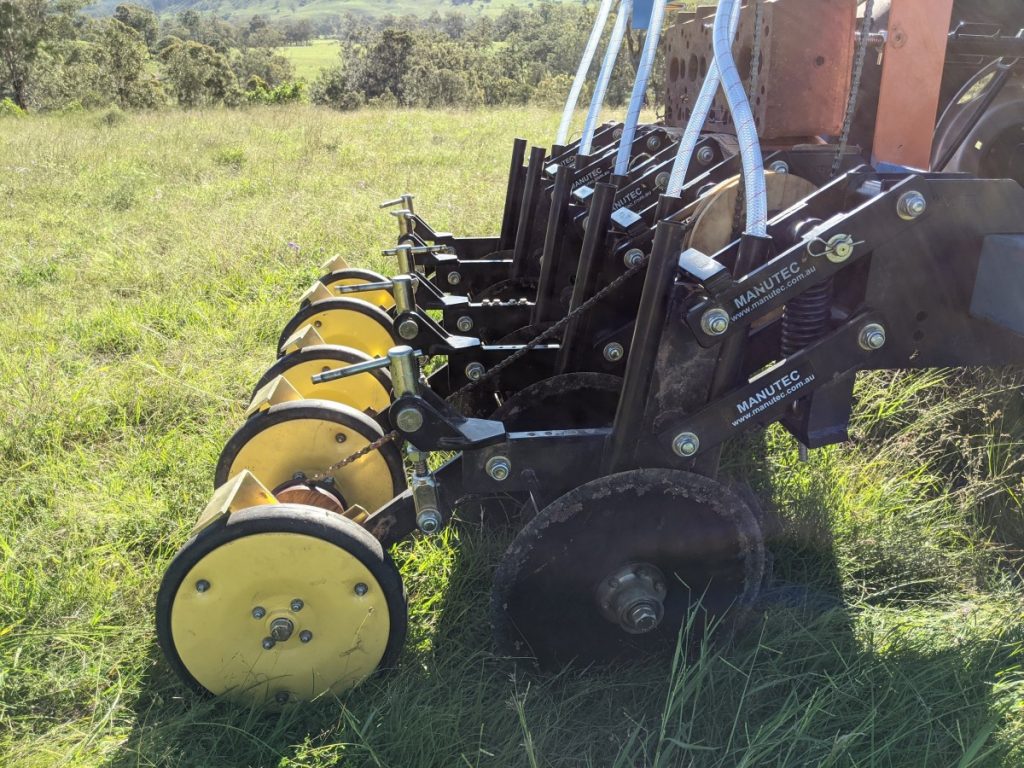

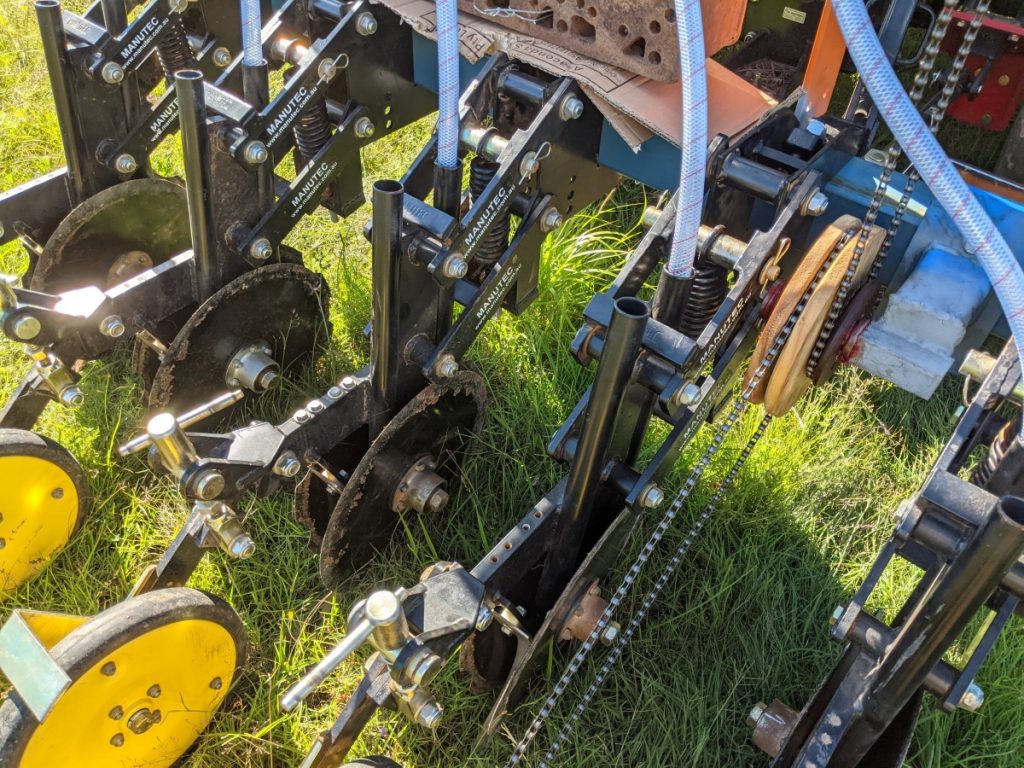
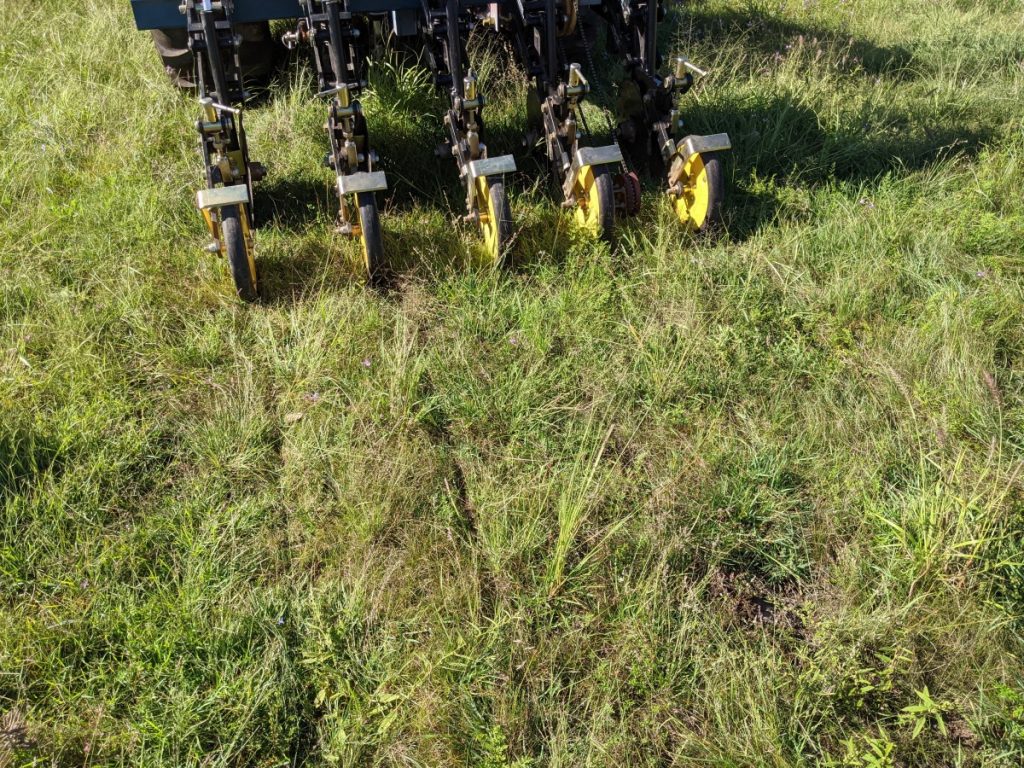
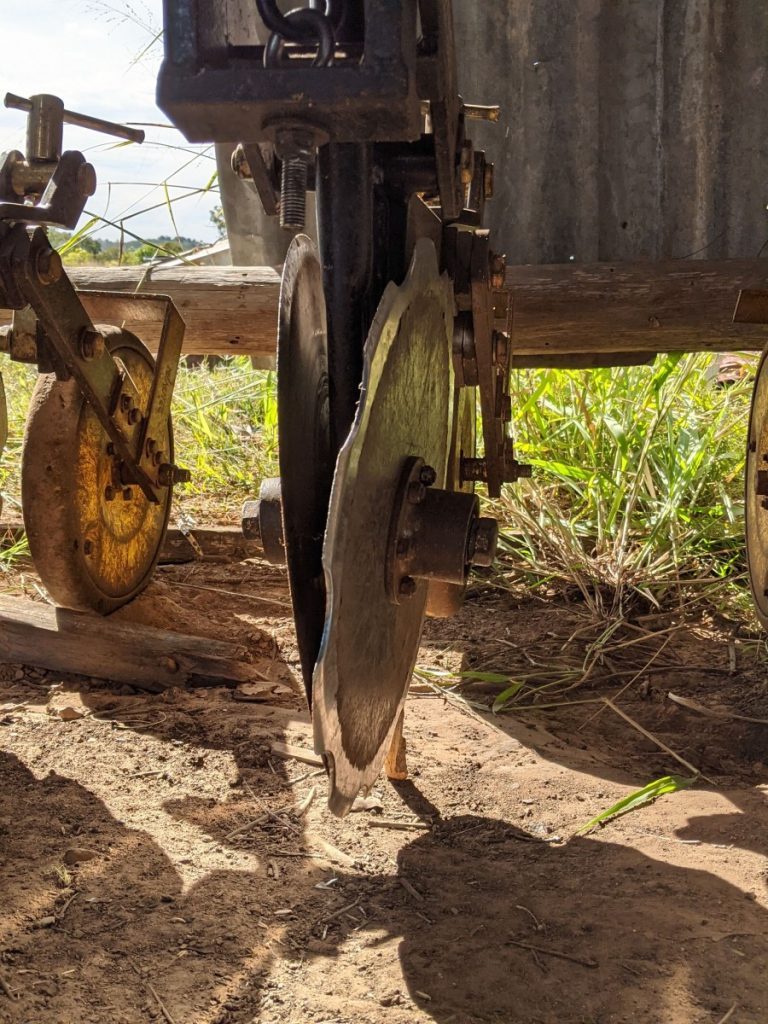
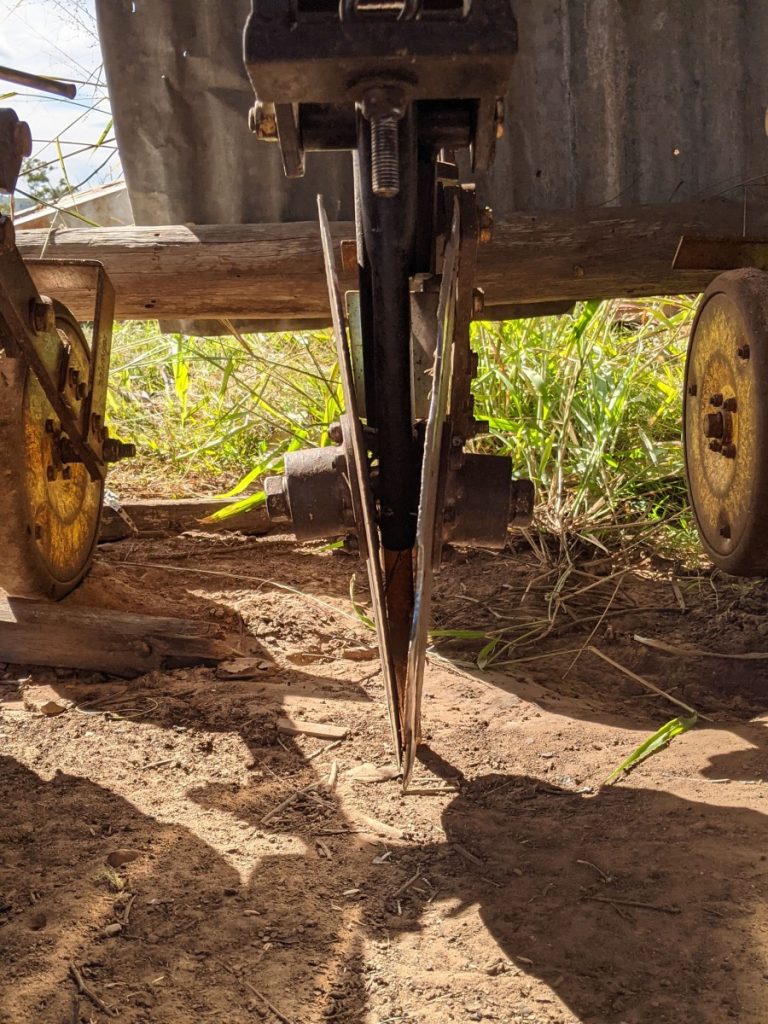
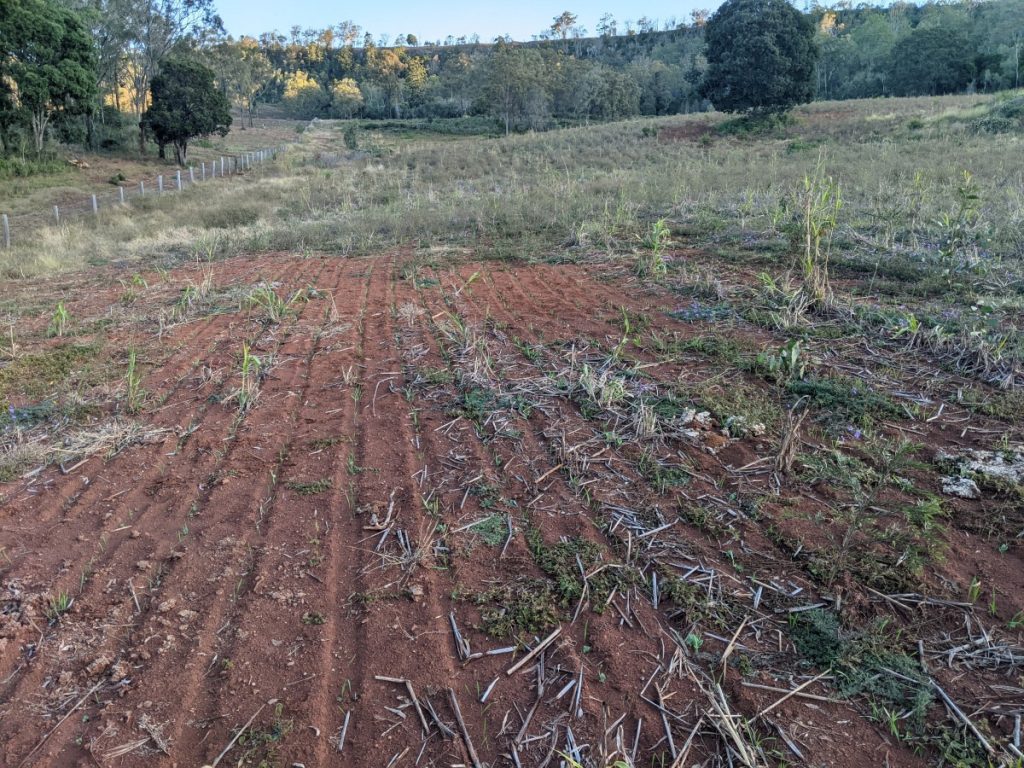
As you can see in the pic just above, there is minimal disturbance to the existing vegetation. This is what the double discs look like up close. The round tube between the discs is the seed delivery tube, which drops it right at the bottom of the slit created by the discs. There is also a plastic firmer right after the disc openers, to firm the seed against the soil, but seems I don’t have any clear photos of them.
To run though the main components, I glued together the seed box from scrap aluminium sheet and spotted gum I had left over. It holds about 100L of seed. There is a PVC tube running along the bottom, that has metering rollers on a shaft.
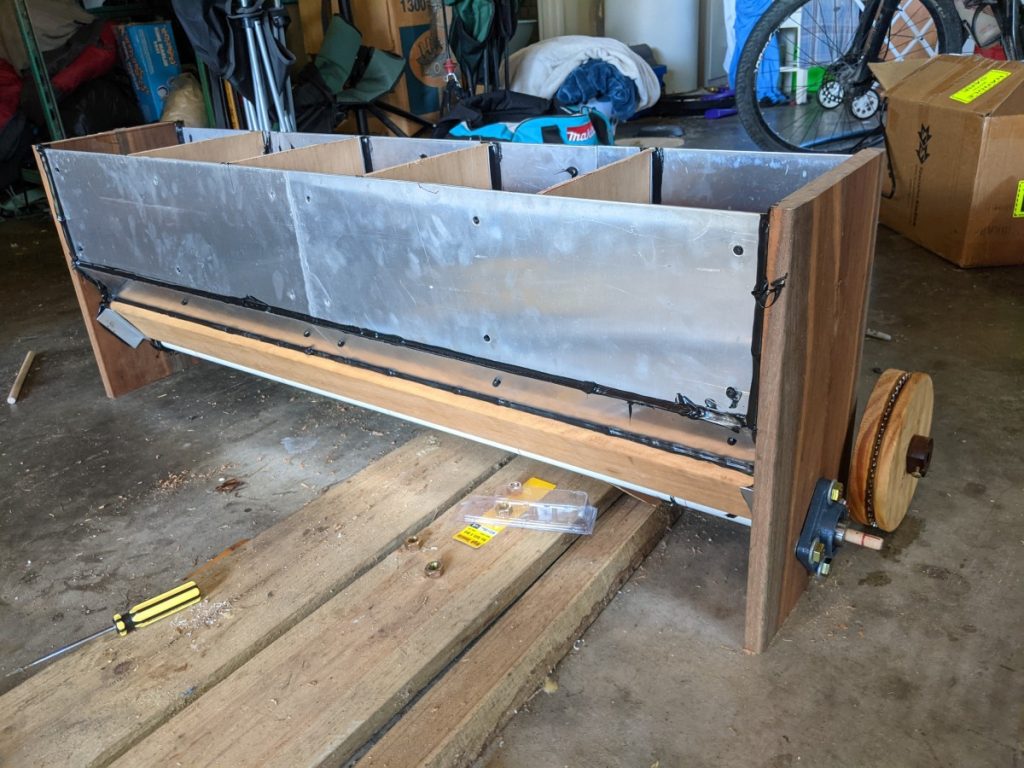
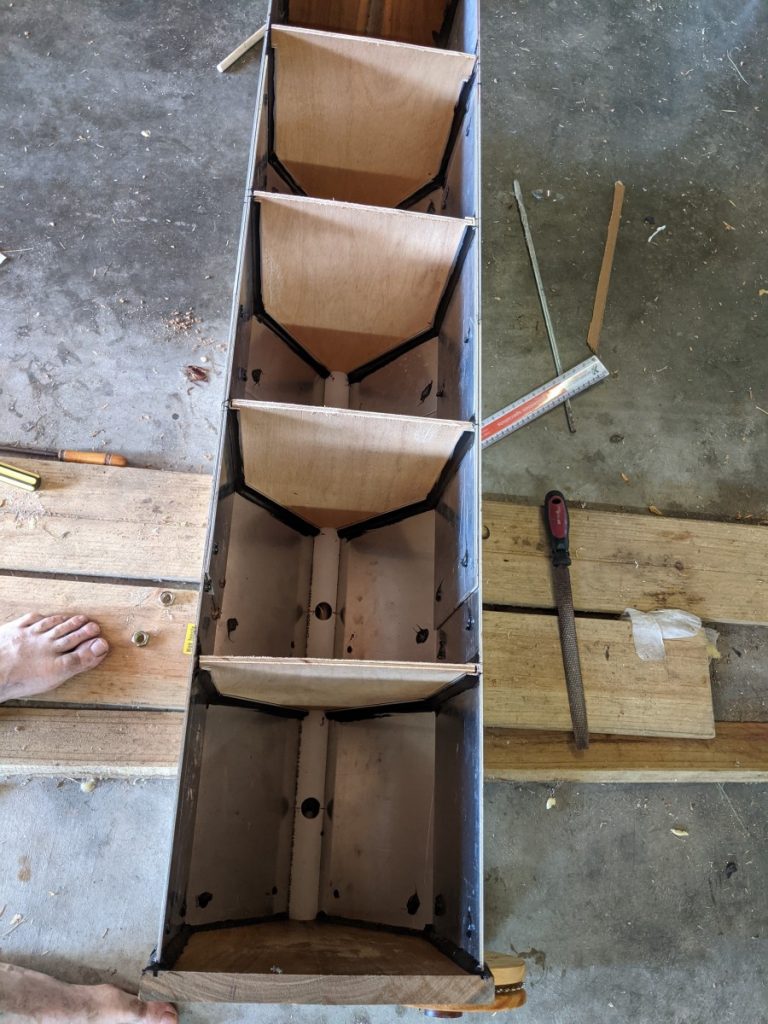
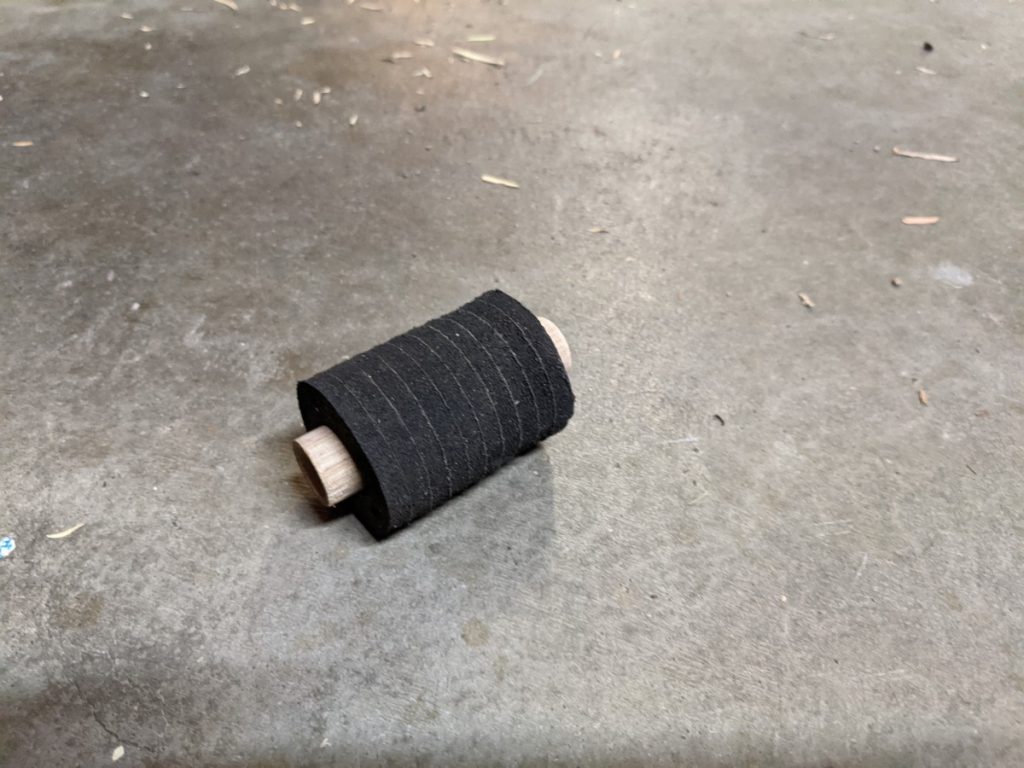
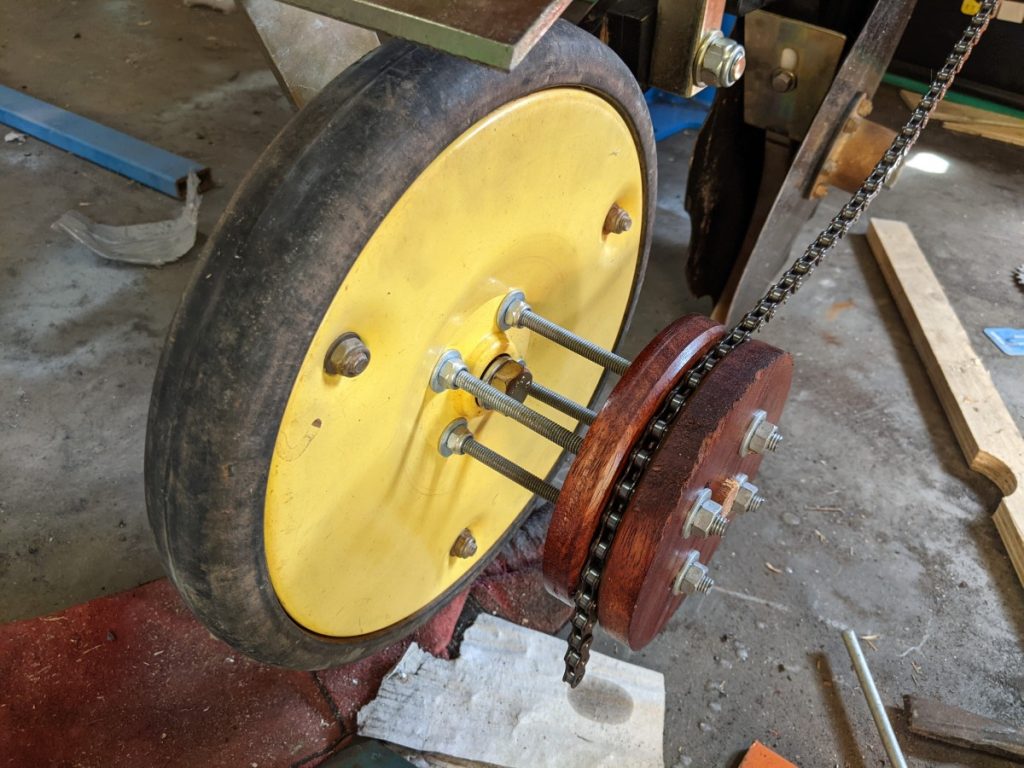
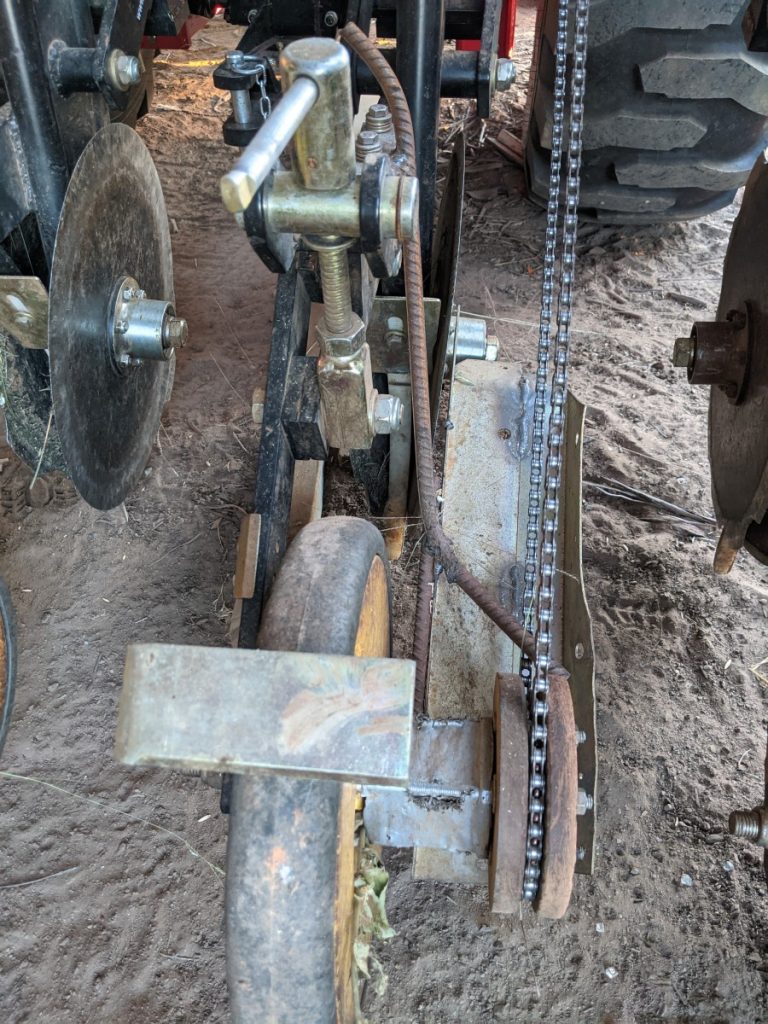
Drive to the roller shaft (that drives 5 rollers, like the above) is via two bike chains and bike chainrings. I figured I could drive it off one of the press wheels by replacing bolts with longer lengths of threaded rod, which is a lot simpler than having a separate drive wheel which I originally thought I’d have to do. Chainrings have timber chain guides either side of them.

Seed is dispensed from box via some high tech funnels (top section of bottles, that hey, have been surprisingly reliable) into two tubes (first flexible, then steel) which feeds the seed directly to the bottom of the double discs – right at the bottom of the V created by the discs.
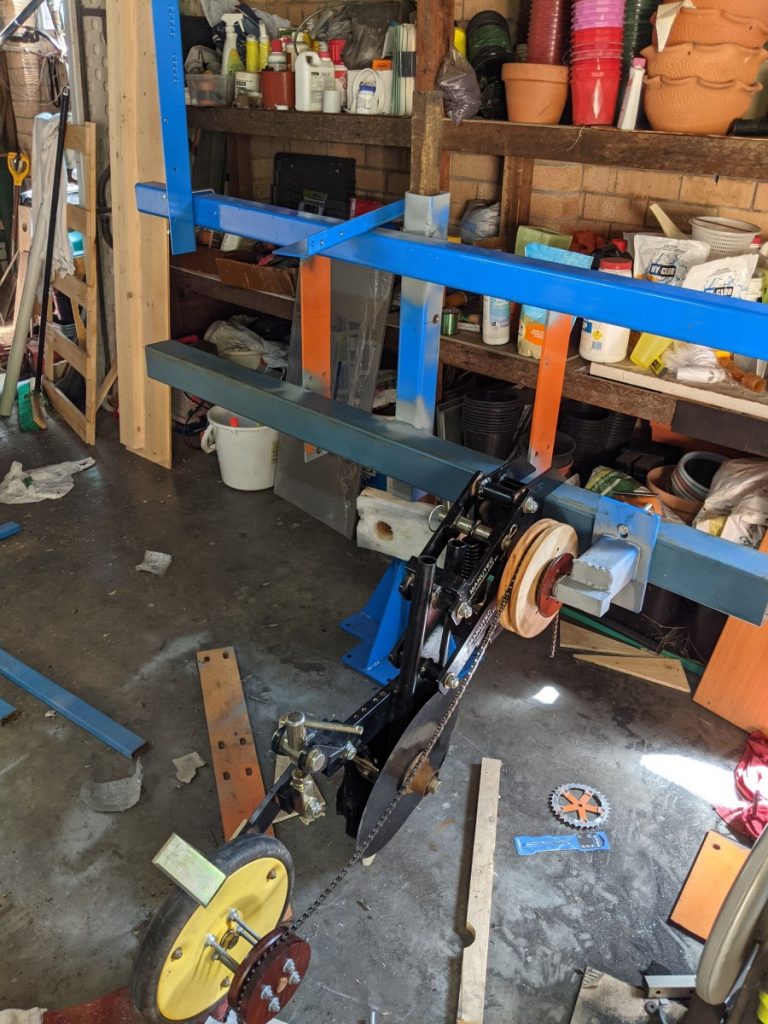
Frame is welded up from left-over steel. There is even an old engine block tied on with wire to add weight!
Each of the 5 double disc row units can move up and down (spring loaded, parallelogram movement), following the ground contour, independently of the others. Vertical travel in these units is 150mm I was told.
What problems have i had? Lots of little niggly things….
Too much vegetation was getting wrapped around the bottom chainring, then causing the chain to fall off. A guard was made to guide the vegetation under it, which was successful and also supported the chain so it bounced around less. The guard is pretty close to the ground though, so does get a heavy beating from rocks, lantana and the like.

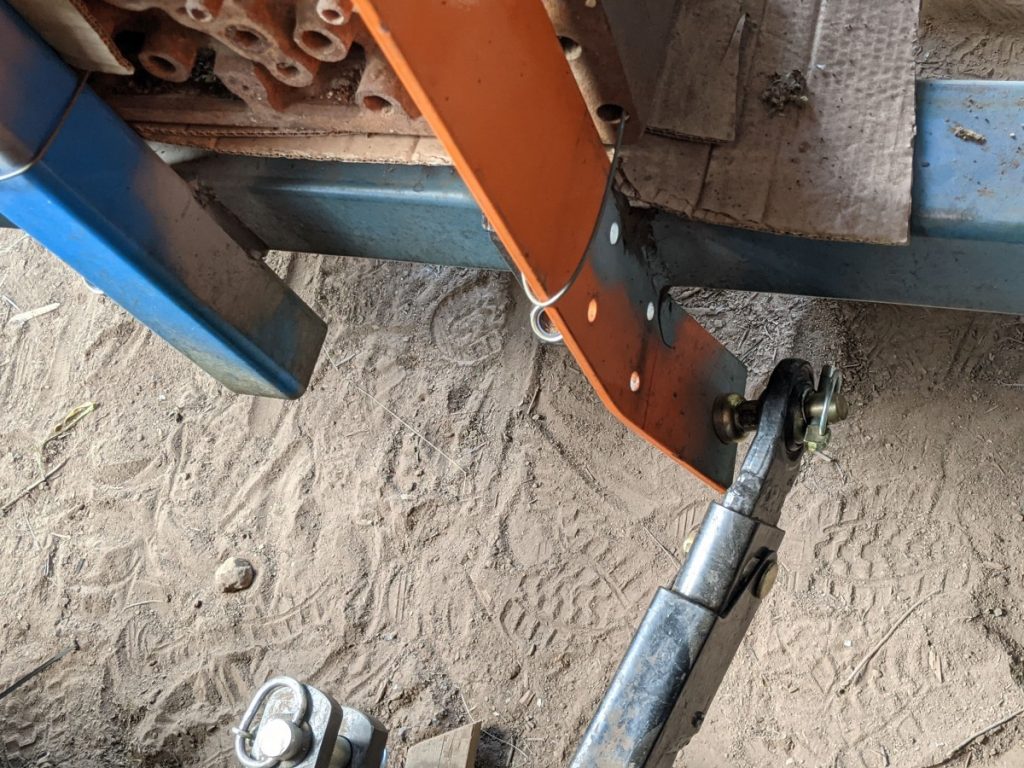
After many hours in the field an upright for the 3 point hitch needed reinforcing, which I did with some angle iron and a brace.
The chain was prone to falling off the top chainring (at seed box) when going along side slopes. Increasing the diameter of the discs/guides either side fixed that.
I get some blockages at the entry to the flexible tube – chaff from the rye grass (I think) can bridge across it and then the seeds catch on that and build up. Also sometimes the seed bridges in the box and doesn’t drop down into the rollers. Have to keep an eye on it to ensure seed is flowing and clear/fix occasionally.
Overall I’m very happy with how it has gone. I’ve now sown many acres, some of it in fields that might be considered equipment abuse… (rocks up to soccer ball in size, lantana, logs etc). Future improvements?
I’ve bought an Arduino microprocessor board, which are cheap as chips, and plan to replace the whole drive chain system with a servo motor drive directly on the seed box shaft. Sensors on the tractor, to determine speed, will allow seeding rate to be tied to the speed of the tractor (like it currently is via the mechanical wheel and chain drive). This should both make the system more reliable by removing some of the more complex mechanical parts, and allow more flexibility – I can easily change the seeding output rate via computer (completely variable gear ratio basically). Maybe eventually incorporate a GPS tracker into it too, so can record exactly where seeded.
That’s about it!
Here’s a couple of vids Dad took of it in action.
Here’s what it looks like after seeding in some bare ground. Its the shape of the press wheel you can see left imprinted in the soil.
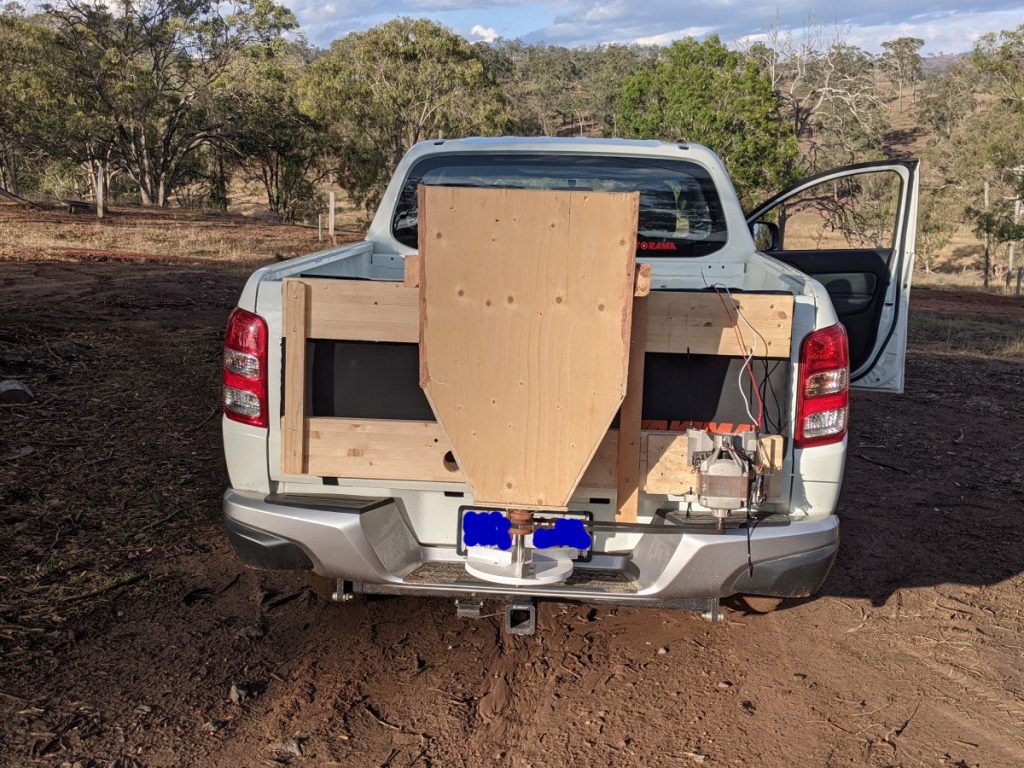
Oh, and back in the spring/summer I also made a spinner to throw grass and other small seeds out onto the surface of the ground. Was a cheap quick job from left-over ply and an old washing machine motor!